
Documentation
Steps to Create your Channel and start Publishing
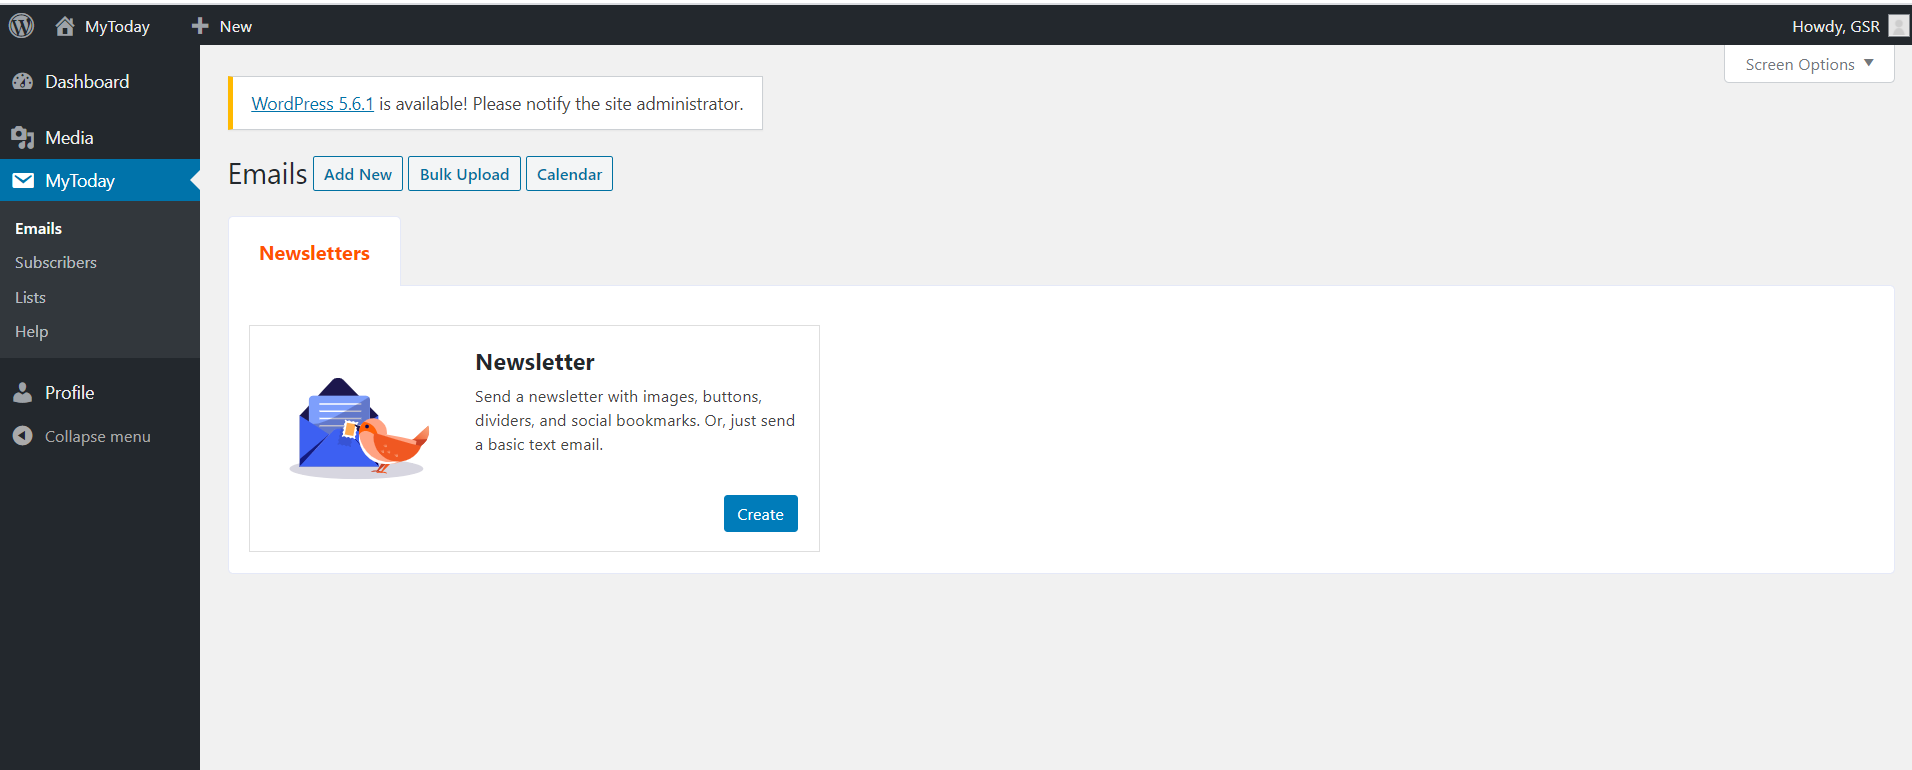
Once you login to your account, click on MyToday on the left side. You should land up on the following page.
The first step is to create a Channel to which you will publish your Microns. For this we need create a List to which we will add our subscribers later. Click on the “List” option under the MyToday menu. It should take you to the following page –
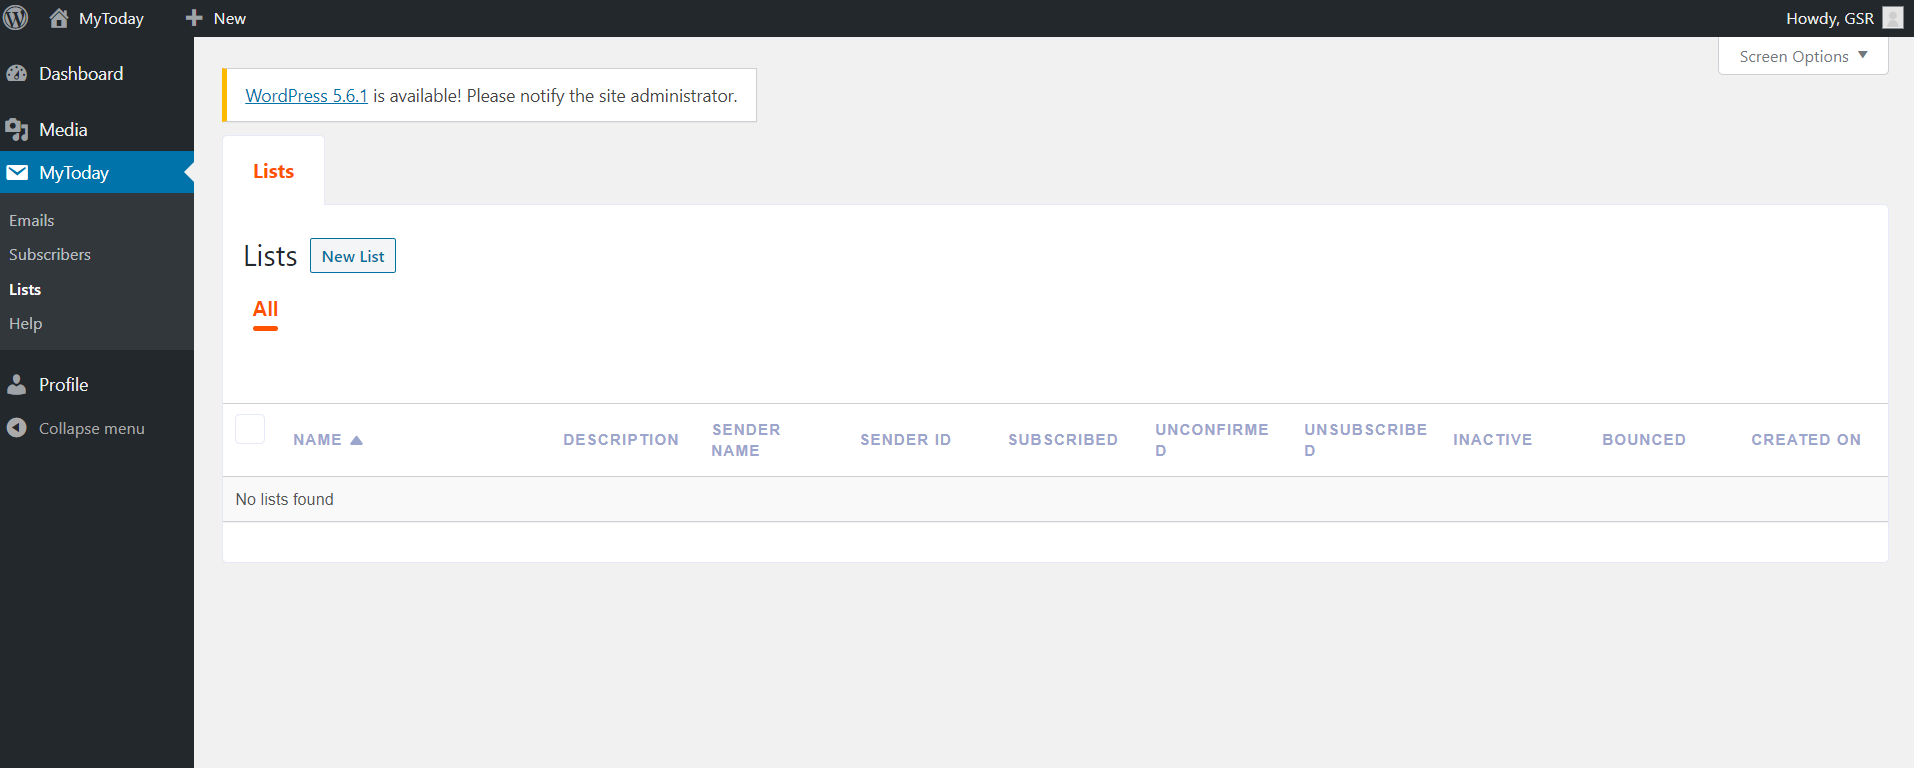
This shows all the Lists that you create. Currently it is blank as you have just created your account. We will see how to create a new List.
To create a new list, click on “New List” tab. You should see the following screen.
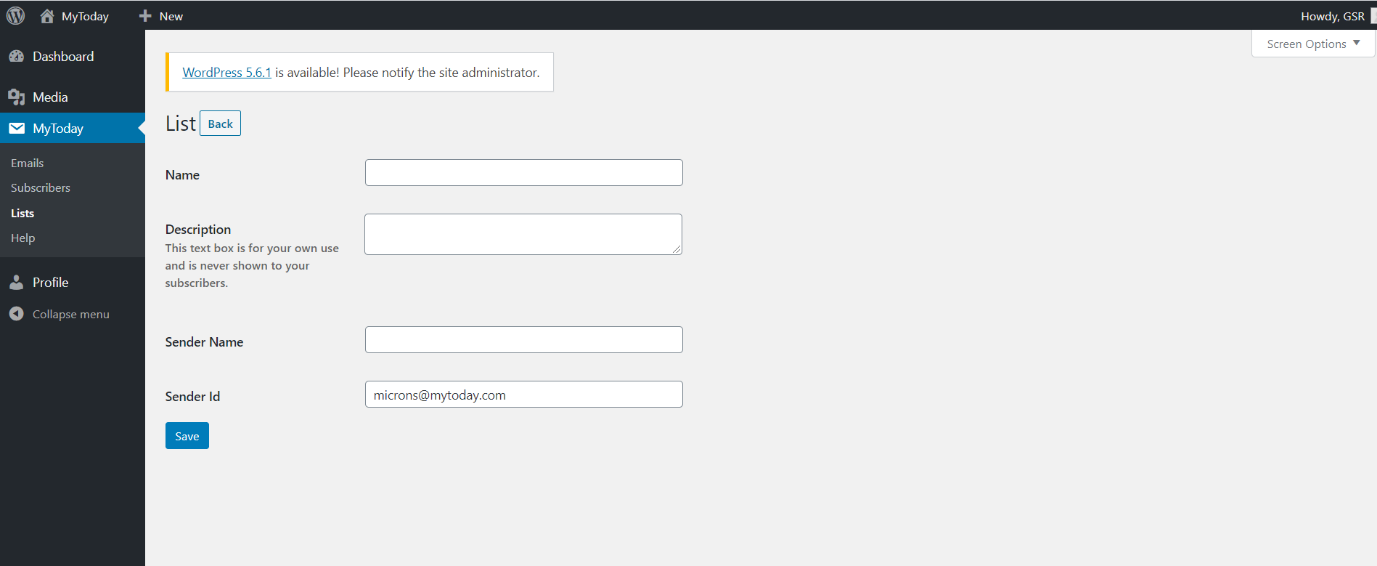
We need to enter some values here for our List.
“Name” is the name that you want to give to your list. This is for your own reference and only you will see this.
“Description” – small description of your list. This is also for your internal reference.
“Sender Name” – this is the name that will appear in your subscriber’s inbox when you send them your Micron. You can always come back and edit this, but give it a thought before you decide on a Sender name.
“Sender id” – this is the email address that your subscribers will see as from where they are receiving email. This is for now default as microns@mytoday.com
Click “Save” and your List will be created.
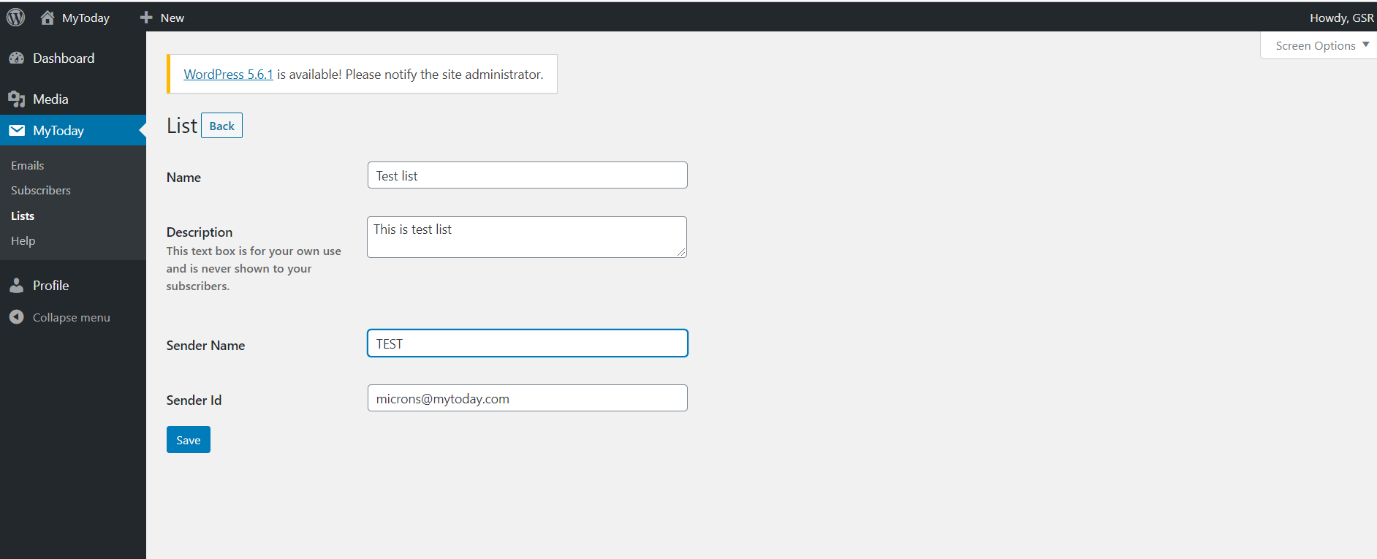
Below is a sample with all the fields populated for a test list. The name is “Test list” and the Sender name is “TEST”
Once you click “Save”, your list is saved and will be visible to you as shown in the example below.
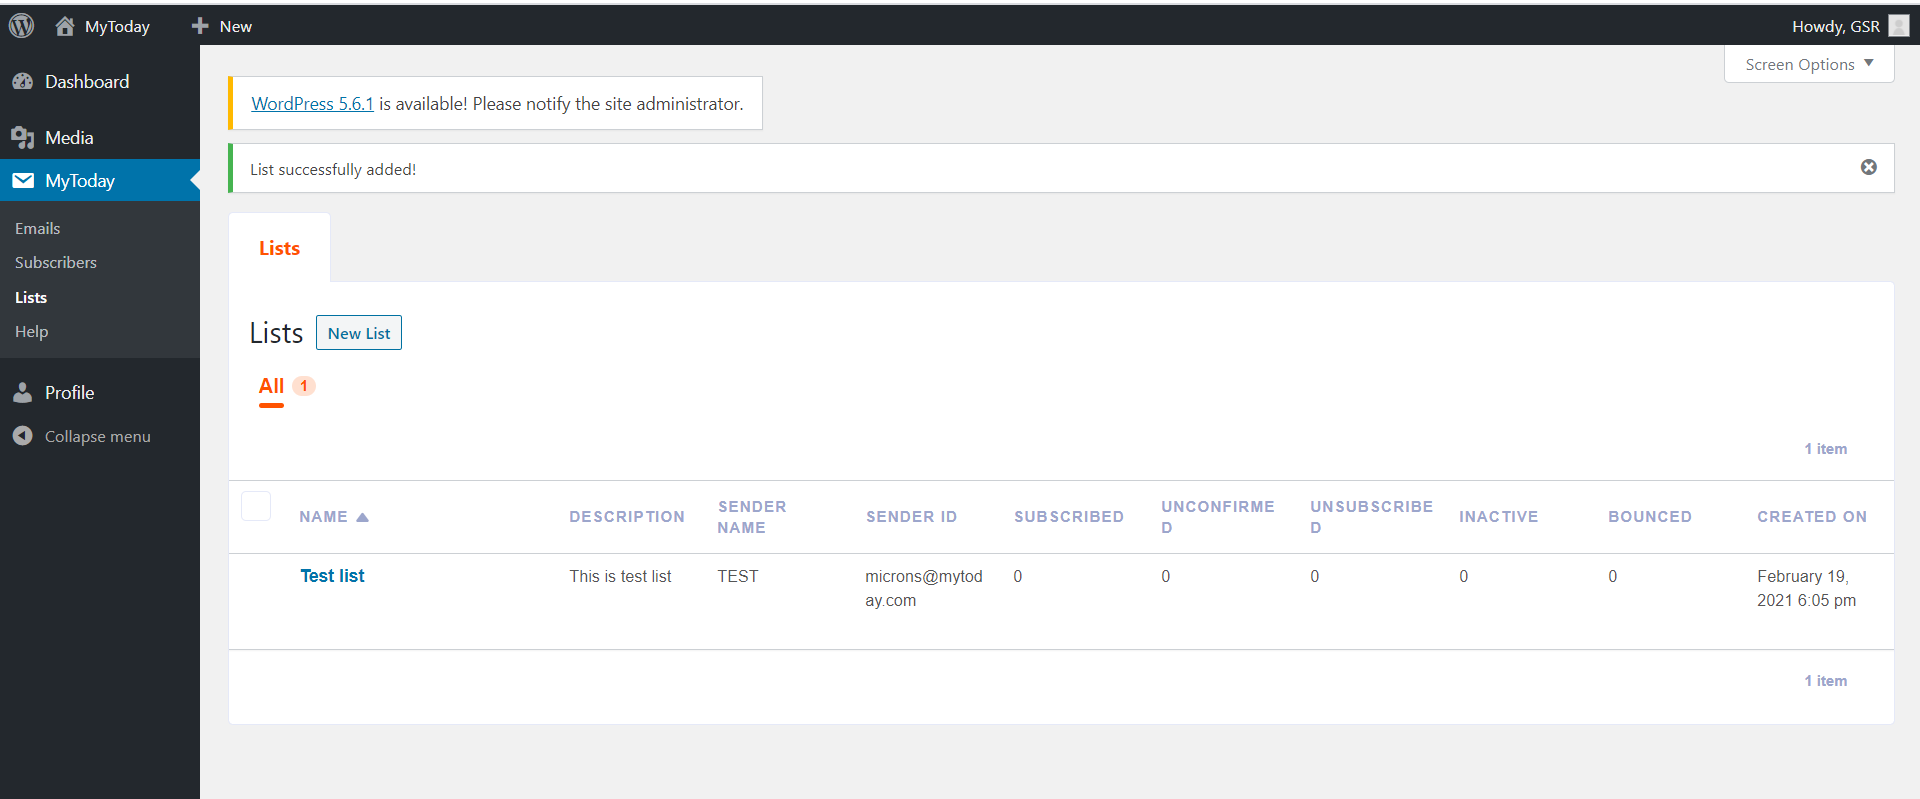
We have now successfully created a List by the name of “Test list”. You can also see at a glance if all the values are correct.
Now, our next step is to add subscribers to our List. For this, you need to click on “Subscribers” tab under the MyToday menu. You should see the following screen.
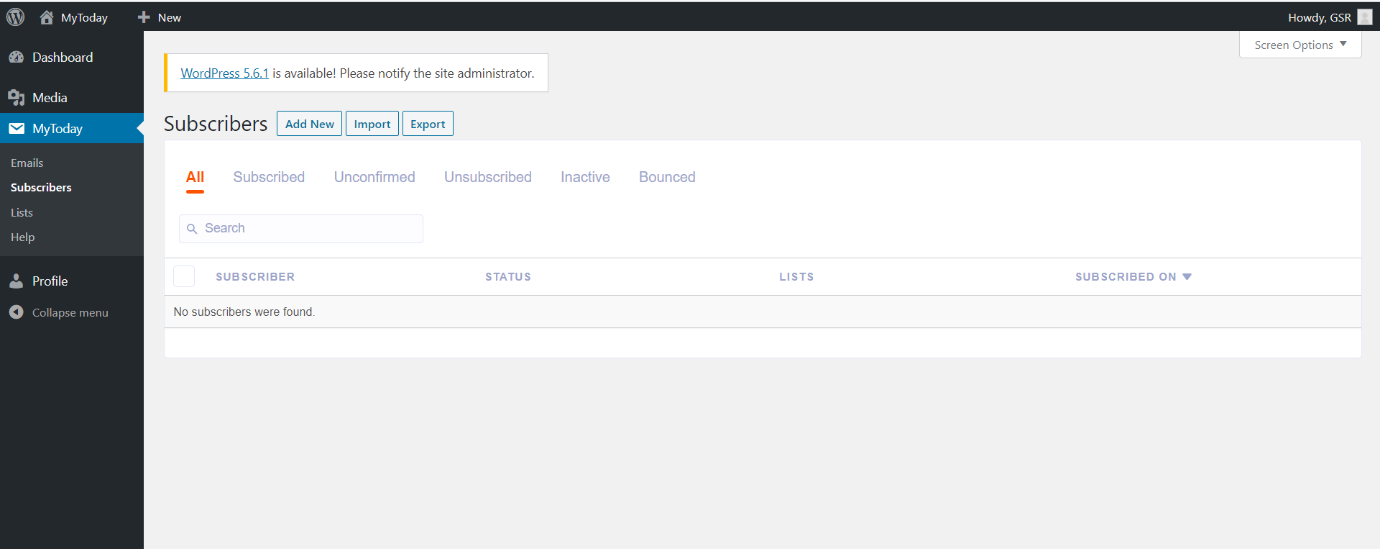
Right now, you have no subscribers. To begin with, you can import some of your old subscribers and start sending emails to them.
Click on “Import”.
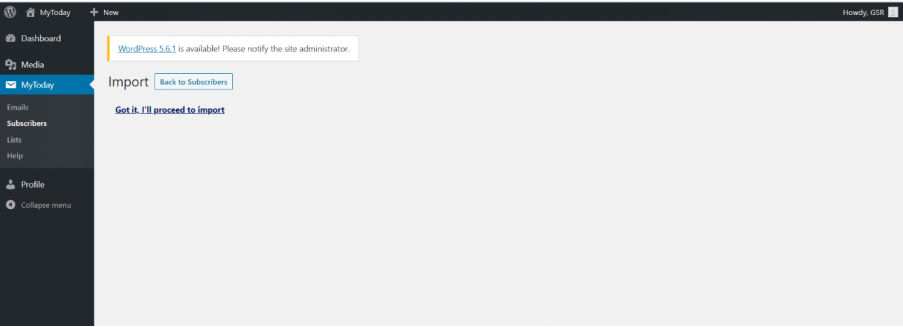
You should see the screen above. You can import only upto 50 subscribers manually. Make sure that you comply with this limit. Click on “Got it. I’ll proceed to import”. It will take you to the following screen.
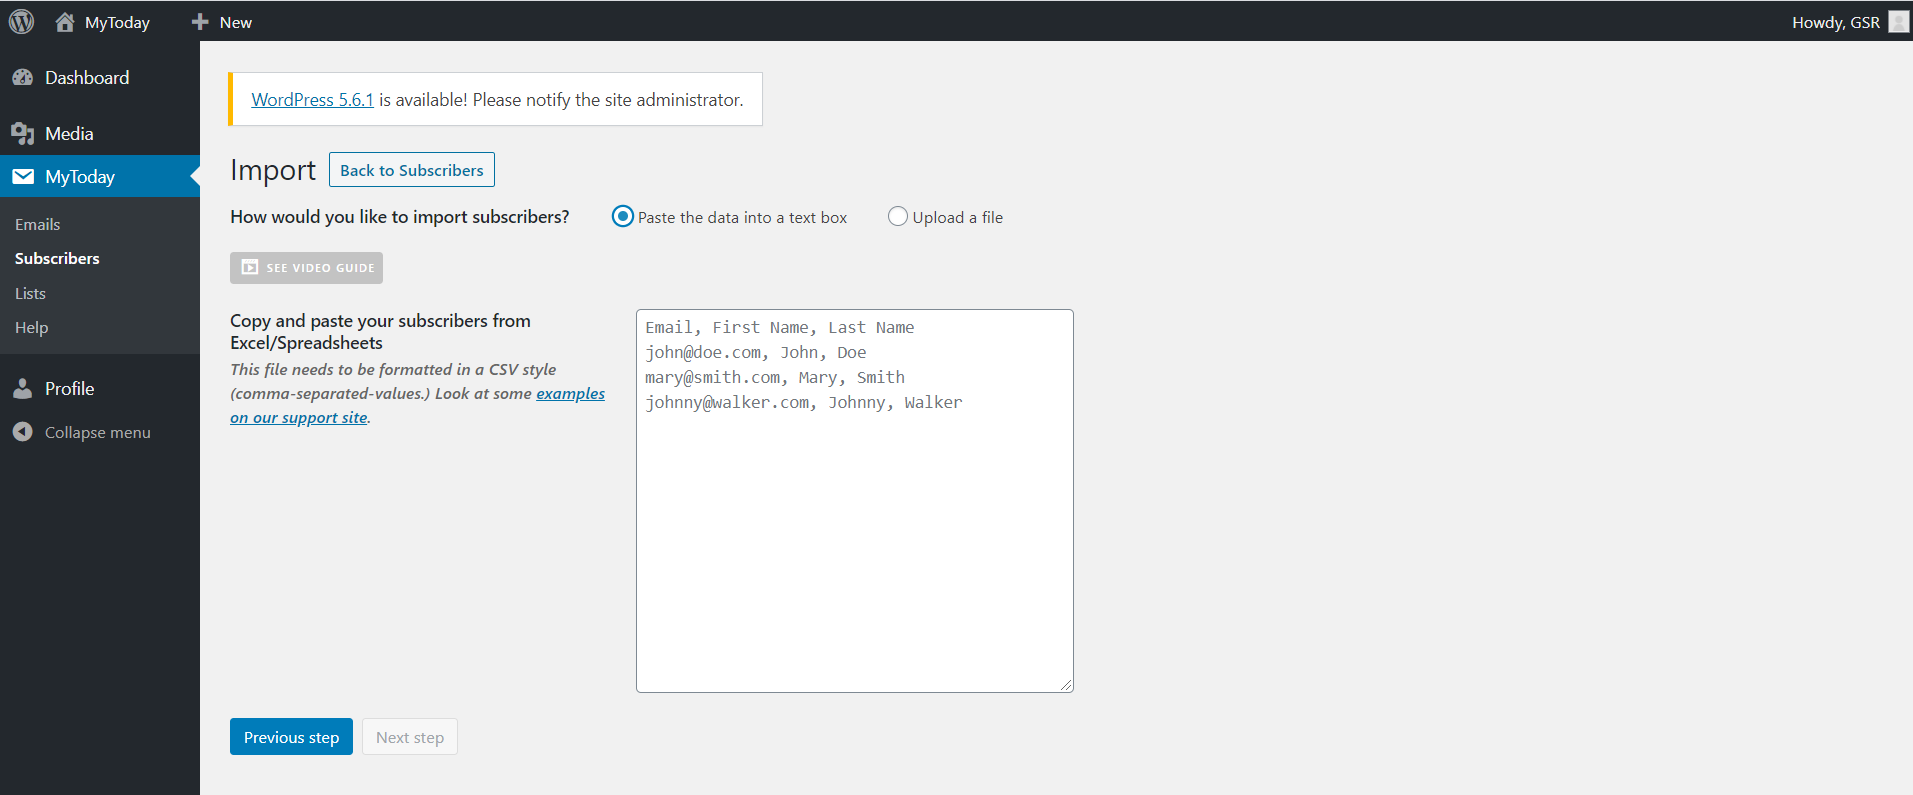
There are 2 options to import your subscriber list –
- Paste the data into the text box
- Upload a file
We suggest that you use the Upload a File option. On choosing “Upload a File” option, you should see the following window.
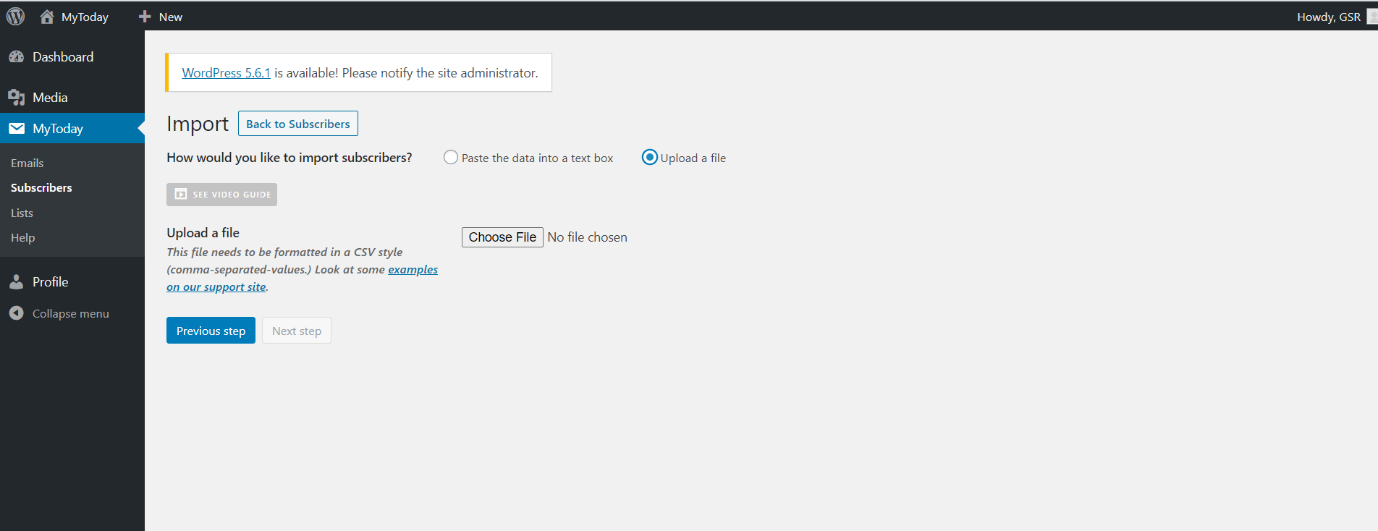
Here you can choose a CSV file that has email ids of subscribers to whom you want to start sending mails. It is important that you use a CSV file.
Click on “Choose File”. It will let you browse through your local machine and upload the file. Here we will try to upload a CSV file named “Test_list.csv”.
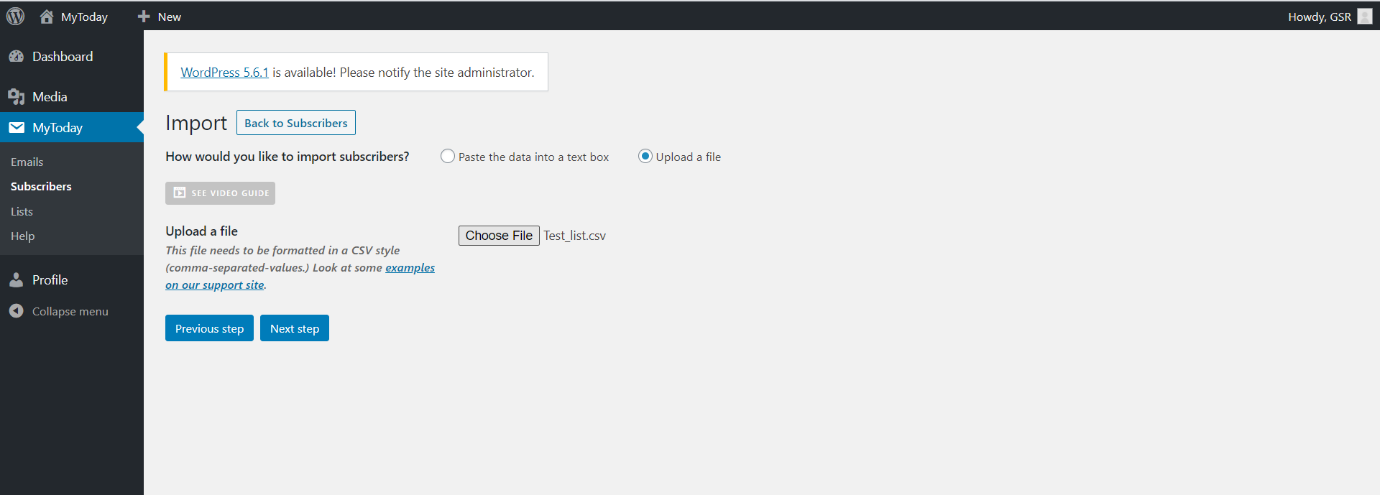
Click “Next Step”. You will see a preview of all the email ids in your CSV file.
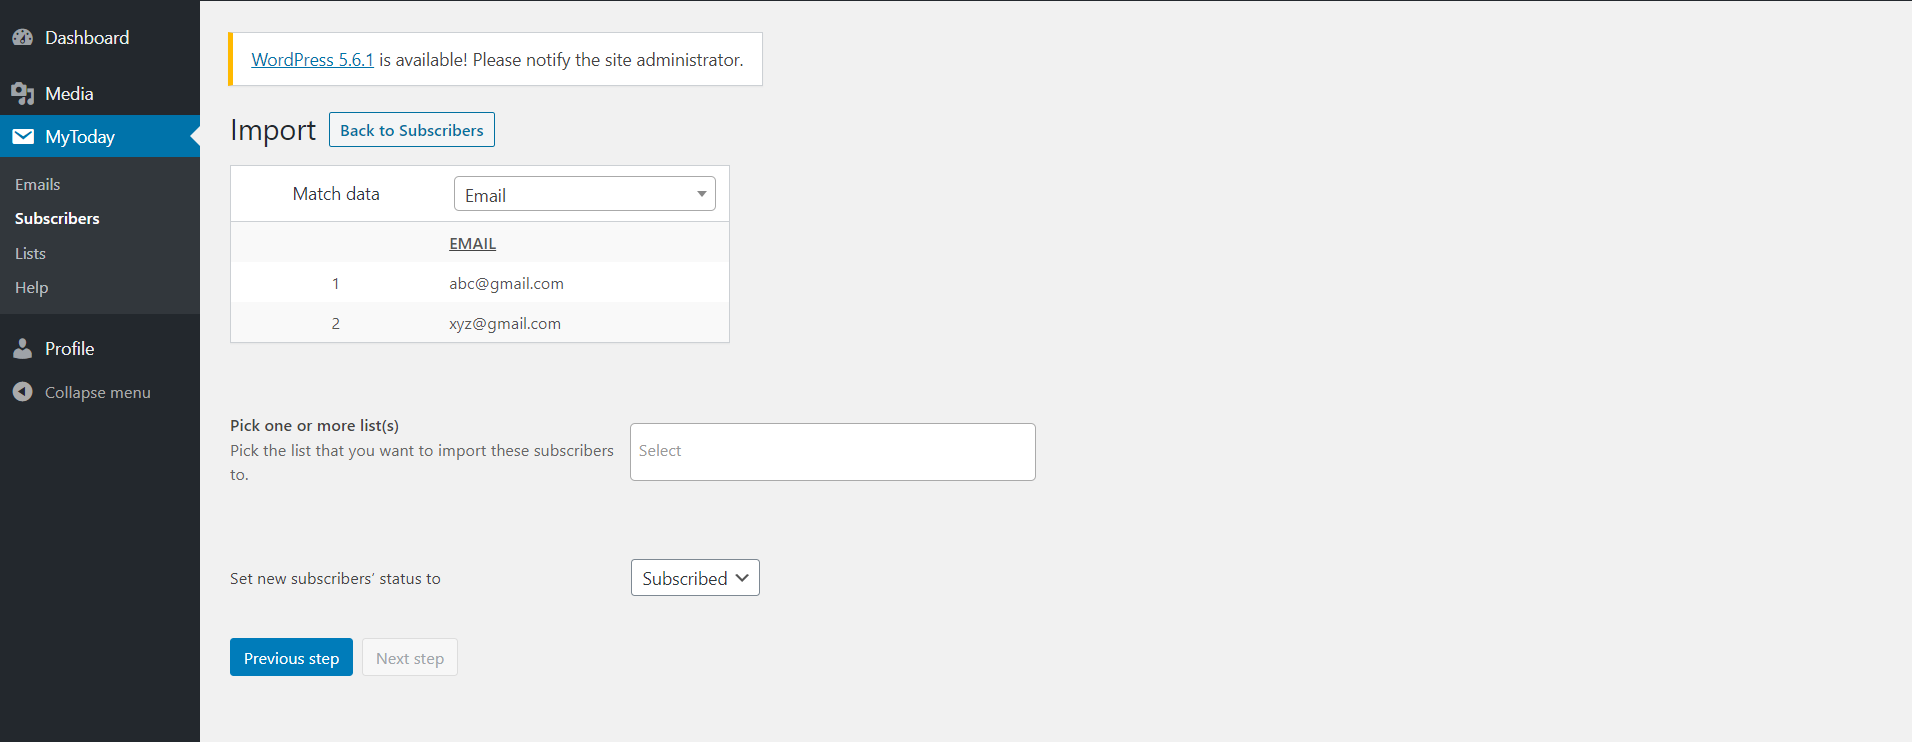
In our “Test_list.csv” file, we had 2 email ids – abc@gmail.com and xyz@gmail.com . this reflects properly in the preview.
Now we have to select a List in which we will add these subscribers. We will add these 2 ids to the “Test list” that we had created before.
Under the “Pick one or most list(s)” field, you can select the list to which we want to add these 2 ids. It will show a drop down of the Lists that you have already created.
In our case, we see the “Test_list” as the List to which we add subscribers.
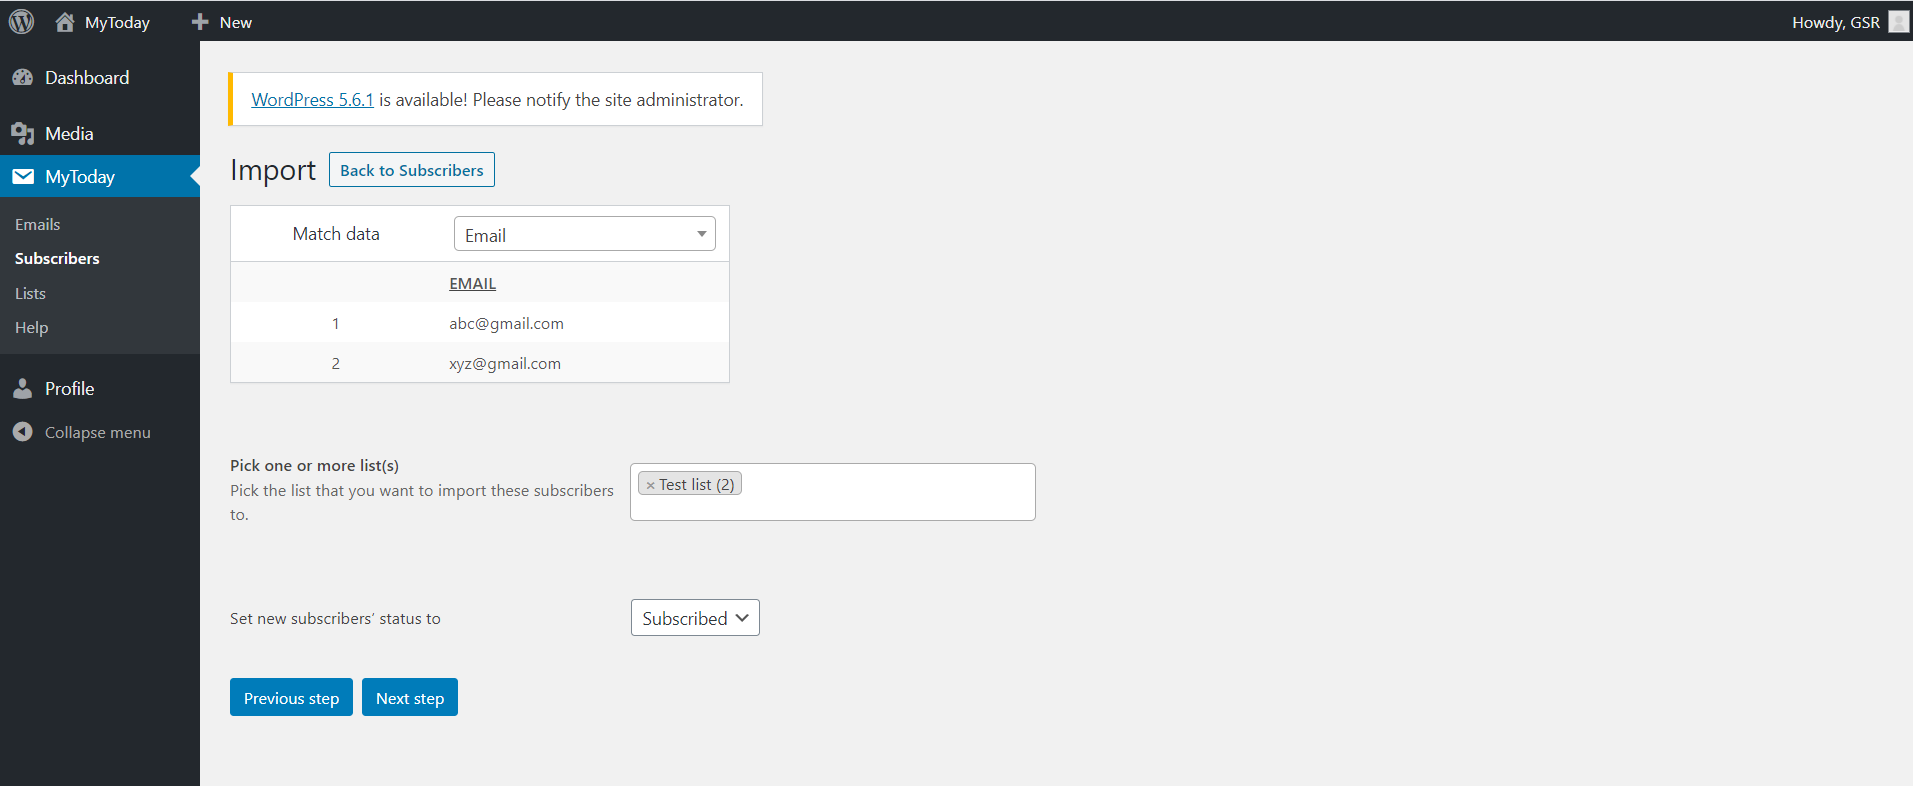
Finally, click on “Next step”. You will get a success message saying “Subscribers were added to your list”. You can import more subscribers or view your subscribers.
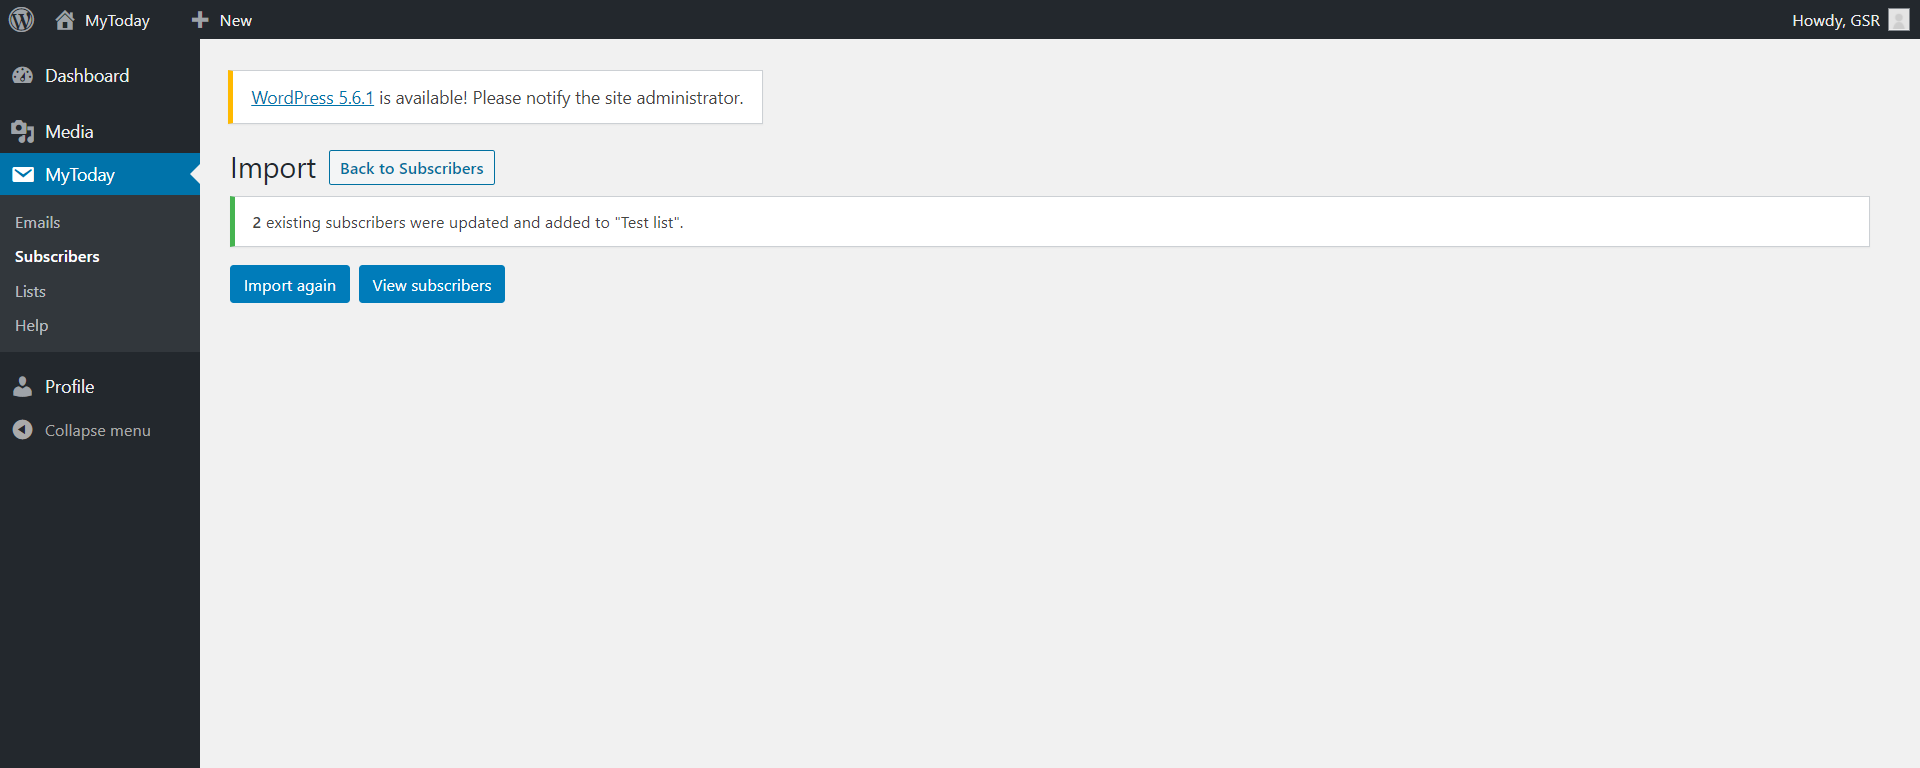
Click on “View Subscribers” to see the subscribers that you have added.
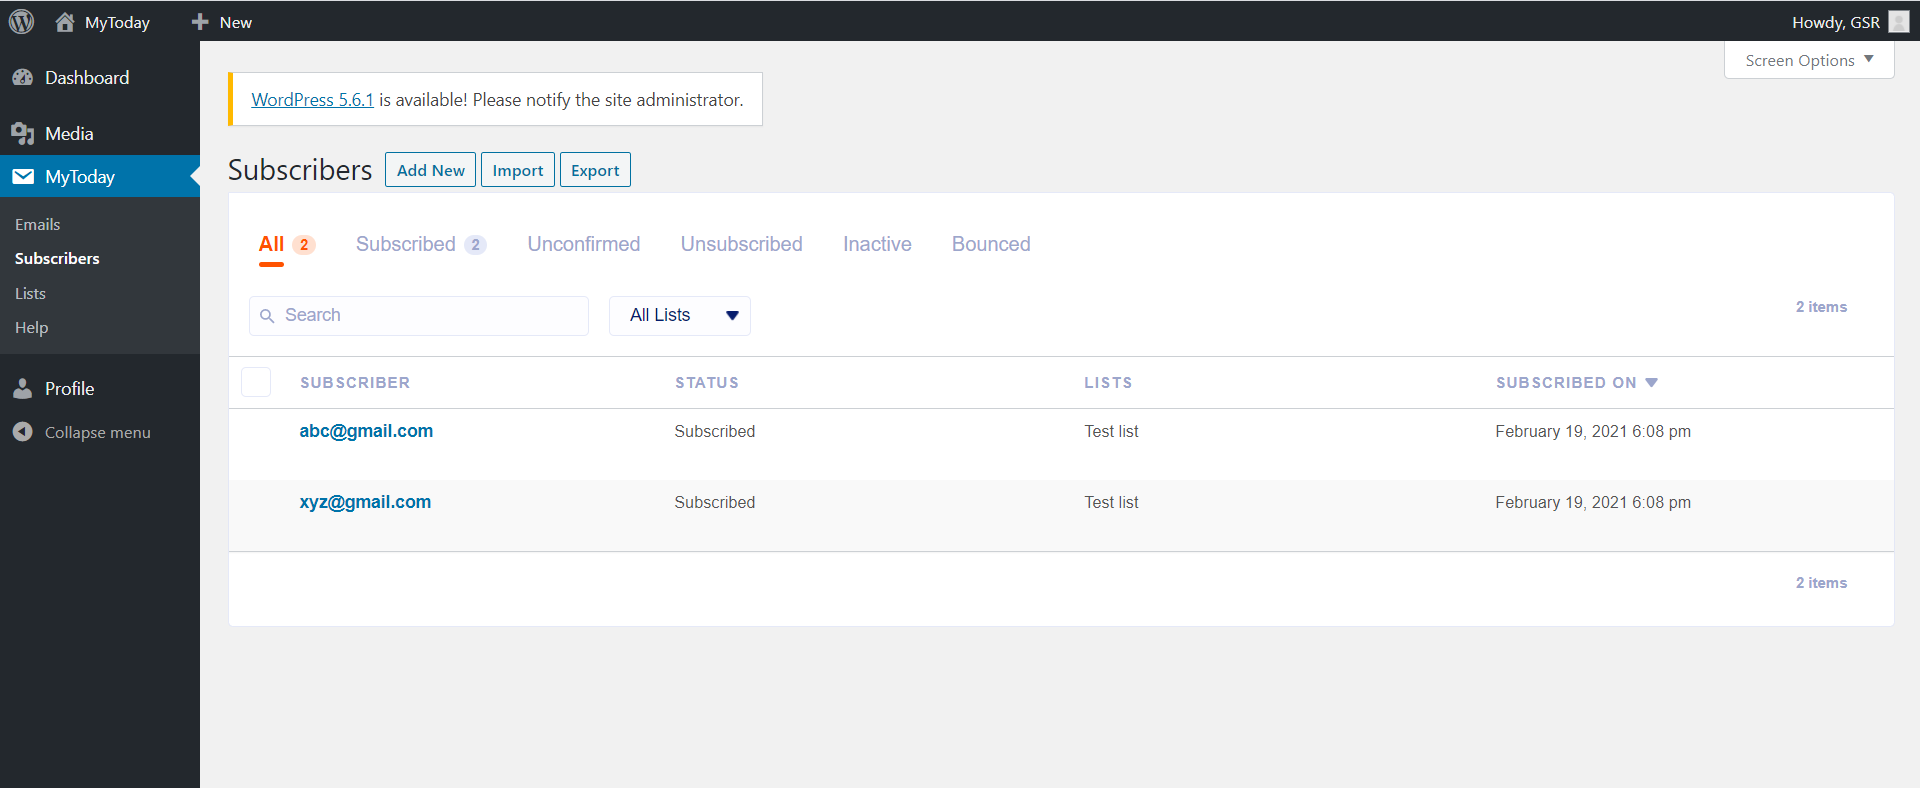
As you can see, we have successfully added the 2 subscribers. You can start publishing emails to them.
Thanks.